Monday, March 30, 2015

Love Card - Stamping on Vellum

Hello stampers!   I'm so glad you stopped by today, because I want to share a technique known as Pergamano, or parchment craft.  So, what is Pergamano.  Wikipedia says:
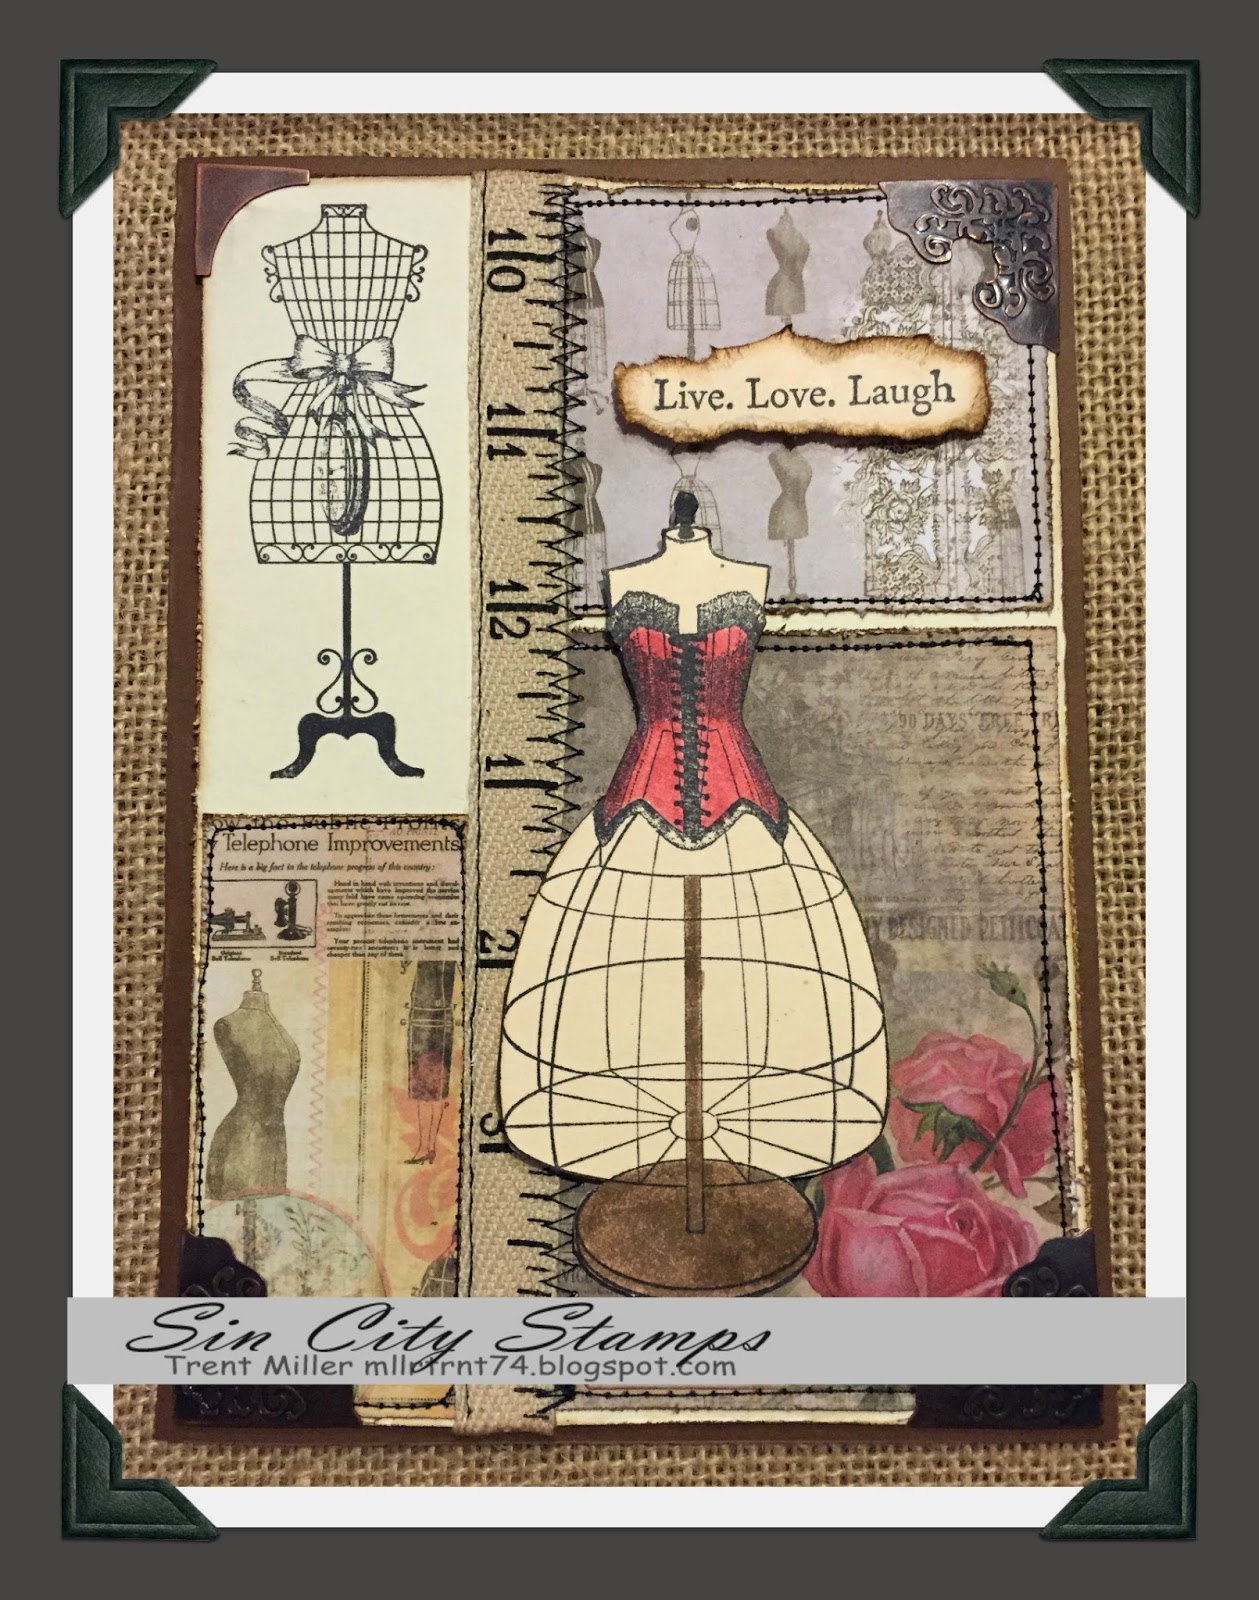
Parchment Craft, also known as Pergamano, is the art of embellishing and decorating parchment paper (or vellum paper) through the use of techniques such as: embossing, perforating, stippling, cutting and coloring.
When I first began learning the fine art of Pergamano, each image was first traced onto vellum using a dip ink pen and white ink before the embossing began.  This was, as you might imagine, very tedious, to say the least.  Of course, I sometimes love tedious, but don't always have the luxury of that much time.  So, I am going to show you a shortcut using rubber stamps.  The effect is elegant and unique!


Supplies used:

Sin City Stamps Angel Art stamp set
Ink Pads: StazOn Opaque Cotton White; Versamark
Vellum (medium weight)
Embossing Tool (stylus)
Detail white embossing powder
Heat tool
Dies: Spellbinders; Momenta
Pearl stickers
Pink ribbon

Directions:

Stamp large harp onto vellum with white StazOn.  Let dry.  
Using an embossing tool with a small ball tip, dry emboss the reverse side of the harp image to raise the stamped lines and whiten the vellum even more.
Now, of course, you can skip the embossing with a stylus part and go right for the quick technique, which is to stamp the image with white pigment ink and heat emboss with detail white embossing powder.   It may not show well in the photo, but the biggest difference is that the embossing powder leaves a shine.  
However, if you are a purist, you may want to try the Pergamano technique.  It is quite therapeutic and can be done while watching TV, or waiting to pick up the kids.  I really enjoy hand embossing my vellum when I have the time.  

No matter which way you prepare your image, the next step is to cut out the harp image with the lacy oval die, which fits quite nicely inside the pink decorative oval die cut (shown below).
Stamp and heat emboss "LOVE" onto scrap of pink card stock with Versamark ink and white embossing powder.  Trim with label die.
Die cut a second lacy oval from brown print card stock, and a decorative oval from pink card stock.  Here are the pieces you will have for your card front.
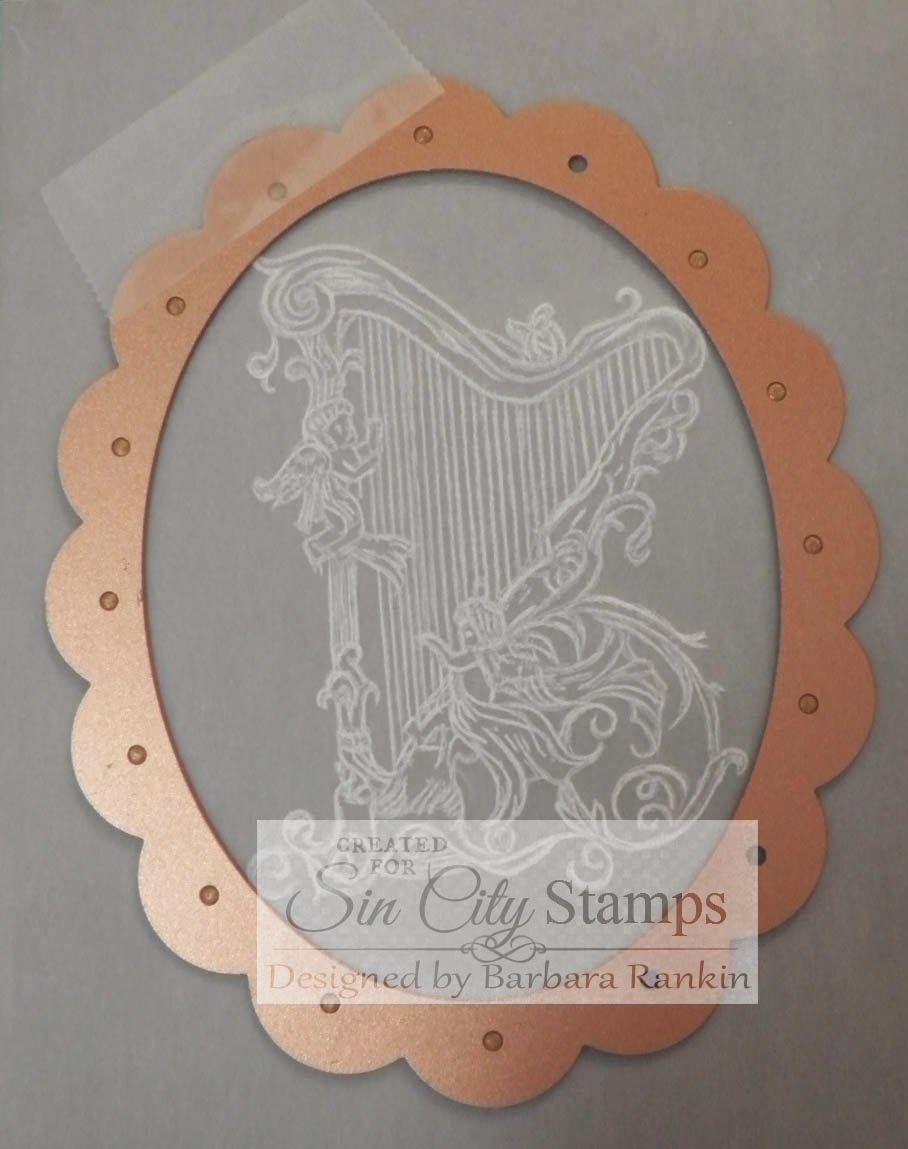
Adhere brown print die cut to the back of the vellum.  Vellum needs a strong color beneath it to show off the image.  This is a good time to use those really bright colors of card stock that you may have wondered, "What was I thinking?"  
The trick to adhering vellum to anything without the adhesive showing is to either add the adhesive beneath a part that will be hidden, or in this case, apply the adhesive over the entire piece of vellum.  I used my Xyron for this.

To put the card together, I cut brown card stock to 10" x 7" to make a side-folded 5"x7" card base.  I then cut another piece of the brown print paper to slightly smaller than the card front, roughly distressing the edges, and adhered that to the card.  I love the shabby chic with elegant look.

Adhere the pink die cut, then use foam dots to raise the harp image.  Add some brown distress ink to the edges of the "LOVE" tag and adhere with foam dots.  

Make a double loop bow with pink seam binding ribbon and adhere to the card with Beacon 3-in-1 glue.  Add pearl stickers around the oval for added elegance.
There you have it, a beautiful card that looks like you spent many, many hours making, but with the help of rubber stamps, you cut your time in half.

I hope I have inspired you today with my Pergamano approach to stamping, or simply stamping an image onto vellum for an easy, beautiful card!

Be sure to like us on Facebook, and stop by the shop to see the beautiful stamps and supplies that Sin City Stamps has to offer.  

Thanks for stopping by, and have a crafty week!

Barbara

Thursday, March 26, 2015

Mixed Media Metal Tag


Happy Friday all!  It's time for a mixed media tag.  In this project we will utilize the Metal Madness Stampset.   I hope you join in the fun and create your very own tag.  Please always improvise with any project using any stampset from http://www.sincitystamps.com. 
Have fun and enjoy in the fun! 
Supplies List:
  • facade (surface): #8 size manila tag (6 ¼” x 3 ¼”) and manila cardstock
  • distress ink: gathered twig
  • archival ink: coffee and red geranium
  • embellishments: silver long fasteners, silver compass coin, silver metal corners, game spinners, custom fasteners, trimmings (natural, black/cream) and word bands observations.
  • adhesives: glossy accents, double sided tape and pop dots
  • tools/other: water mister, craft sheet, scissors, ink blending tool, ripper, heat craft tool and sewing machine
  • stamps used: Metal Madness Rubber Stamp set

Step 1: Let’s start out collecting what we will need to make this tag.

Step 2: First start by taking the #8 size manila tag and using gathered twig distress ink  by cover the entire tag using the blending tool.  We will squirt water now into the palm of our hand with a water mister and flick that over the top of the tag.  Then using a heat blending tool dry the tag and blot any excess water off with a rag and/or paper towel.

Step 3: Second let's take tissue tape and place this randomly across the face of on the tag.
Step 4:  Now take a few of the stamps from the metal madness rubber stampset and create a desired background.    I lifted up the tissue tape cases to stamp behind the tissue tape.  I used coffee archival ink when stamping onto the tag.
Step 5:  Our next step is to use scissors and cut off the excess tissue tape around the tag.  Using a distress ripper rough up the edges of the tag.  Finish off the edges by dirtying them up with gathered twig distress ink.
Then we will use the sewing machine to add a standard stitch to the tag that will add further dimension.  This is one of my signature items to use In a project - the sewing machine.
 Step 6: Then we will take the pendant stamp and using black archival ink stamp this onto manila card stock.  Using scissors cut this out of the card stock.
Step 7: Now we are going to add this stamped image to the card stock with pop dots and begin the process of adding embellishments. 
Step 8: In this step we are going to add another stamp to the upper left corner of the tag using archival ink red geranium. Immediately after stamping apply clear embossing power on to the stamped image.  Then using a heat blending tool heat to give you an embossed look.
I finished that off by adding a Tim Holtz Idea-ology custom fastener.   Then we will stamp a word saying onto manila cardstock and roughed up the edges.  Finish that off by dirtying up the edges with gathered twig distress ink.
Step 9: Final step is to take some trimmings and dirty that up and run that through the hole at the top of the tag and we can consider this project done.  Here is a picture of my finished piece.
Thanks for checking out this fun tag and stopping by the blog.
Check out the store today by looking at the great stamps, stencils and products that you can chose from which will be great additions to your home.
Trent-TMCreative

Wednesday, March 25, 2015

Mixed Media Madness!!


Hello All Lanette Here!

Today I am going to share a mixed media collage, My first one ever!!!

Lets start by taking a look at my canvas, then I will show you how I made it :)


Sin City Supplies Used: Rosette Hearts Dress forms plates of Rubber.
(Plus a bit of trimmings from a plate I'll show you the trick later)

Other Supplies Used: Beacon 527, Quick Grip & 3 -in-1 Adhesives, Liny Stamp Gang Mists. Inka Gold Rub, Prima Glitter & Beads. LOTS of  Chipboard & random trinkets from my stash.

Now lets look at my process......

I started by building my canvas by gluing random chipboard pieces, metal trinkets and buttons to an old canvas.


After my glue was dry I covered everything with 2 coats of gesso.(That's why I was able to reuse a canvas I had given up on.)
 

While my gesso was drying I took some time to mount my stamps. and I had a fun idea! 


Finally it was time to start laying down some color!!!


Next I went back and added a bit of gesso
and Inka Gold to highlight some pieces.
 
 
After that layer was dry, it was time to add a bit of
stamping, glitter, trinkets and beads to finish of my canvas,
 
 
 Which brings us back to......


I may still go back and add a quote but for now I'm pretty happy with my canvas.
I've been wanting to try this technique forever :)

Now just a few details just for fun!


Here you can see the extra detail 
the random stamping adds to my project.


Thank you so much for stopping by today!

I hope that I have inspired you to have some inky fun of your own!


Remember to like us on Facebook and stop by the store for all your stamping needs!!

As always feel free to stop by my blog Stacks of Scraps anytime!


Sunday, March 22, 2015

TERRI SPROUL INSPIRED "ORGANIC LOOK" ART JOURNAL PAGE

If you didn't already know, Terri Sproul has a free art journal/canvas show every Tuesday night.  Check out her Facebook group All Things Terri Sproul to get all the details!  It is her birthday this week, so she isn't having a show.  HAPPY BIRTHDAY TERRI!!!

This art journal page I made for SinCity Stamps was inspired by Terri's show last week.  The show was called "Organic Look".

SUPPLIES:
Just as Terri showed on her show, I started by applying masking tape on my pages and covered them with Gesso.  The maksing tape gives the background the beginning of the "Organic Look" because it is irregular, like nature.

Because I didn't have large stamps for the flowers on my pages, I did some messy writing on the gesso, to take up space and write down something I wanted to remember.  I added India Ink to my Fineline Applicator and wrote on the page.


Then I painted over the writing with Halo Pink Gold and Pearl Turquoise.  I added glazing medium to the paints, painted them on and wiped them off with a baby wipe.  You really see the masking tape texture when you use glaze.

*sorry for the slight glare.  It's hard to not get a glare with metallic paints*

Like I said, I didn't have big stamps like Terri had, but I had a plan!  What if I took the tree branch from the "Hoot Owls" set and stamped it several times, making the look of a bush.  Then, I could turn the branch over and make some leaves and swirls at the bottom.  AND THEN, I could add the roses from the "Rosette Hearts" set and it could look like rose bushes!!  OH MY HECK!  This was going to be the most awesome thing I've ever made or the worst.  SO I just went all in, and got....

AWESOME!  I am so in love with this!  My vision is a total success!

I painted the flowers with Pearlescent Magenta and Metallic Gold in the centers.  WHAT?  Perfect! 


 But how to get that "Organic" look Terri talked about???  Flower Soft of course!!  I used Tombow Mono Multi Adhesive and a Fineline applicator to add glue, and sprinkled Flower Soft on top.


What do you get when the Flower Soft dries?  Awesome times 5million!!!


Here is a close up of my rose bushes with Flower Soft on the stems and leaves.   


Don't you just love when a project comes together like this?  I love when this happens.  You get an idea and that idea sort of takes over.  Like it has a mind of it's own.  I love the excitement and the slight fear you get at the same time.  But when it turns out better than you expected it is priceless!!

I hope you let the art take you on a journey of excitement today!  You will love the results!
xxDaniella

Friday, March 20, 2015

Welcome Spring!

Heyyy it's the first day of spring!!  I don't know about you, but I am more than excited!  I have been anticipating the color of the new blooms and the sun beaming on my face!  I am more than ready and excited the snow is gone.. Well for us anyway! On with my project!  In honor of the first day of spring... 


My Supply List for this project were-
Sin City Stamps- Plate of Rubber- Bingo
Dylusions Sprays - Bubble Gum Pink and Calypso Teal
Neocolor II
Derwent Inktense Pencils
Liquitex - Clear Gesso
Sharpie China Marker- White
Deco Art Paint Pen- Black
baby wipes
Pentel Water brush

I began with a page I had already laid a gelli print background on.  Wasn't pleased with the print, but knew it would come in handy sooner or later.  (smiles)  I put the clear gesso down because I didn't want to lose the color from the gelli print, but I wanted to prime my page.  I love working in my Cottonwood journal.  Not only does it give a professional quality on the exterior, the quality extends to the inside pages, which also open flat and they don't bleed through! 


I then proceeded to use my spray inks and stencils to add even more color and details.


Then I added a bit of white gesso to tone the colors down enough to add some stamping.  Today I chose to use my stamps unconventionally. These stamps have absolutely nothing to do with my subject, but they add texture to my background.  The images are NOT perfect.. but the broken lines and partial images are there.. as I wanted.  I love getting these stamps with just the cling backings makes it easy to either attach to an acrylic block or just stamp!

 gesso
 added stamping..


Then I drew in three outlines of tulips with my Inktense pencils.  Activated the the lines with my water brush and colored with my neocolor IIs. I turned the scribbled lines from my neocolor IIs into  a more painterly look with a simple baby wipe.  I gently moved my colors about the page as needed and I love it!


I decided as I finished my piece that I needed some SUN and a Welcome Spring and added that to my page.  I enjoy creating journal pages and hope that today's tutorial inspires you to create using Sin City Stamps products as well. Thanks for coming by and have a great weekend!!  :)


Friday, March 13, 2015

The Dressform Card

  Happy Friday all!  Hard to believe that we are already into the middle of March.   For this project I wanted to utilize the Dress Forms Rubber Stamp set.   This stamp set is really cool and very fun to make a project with, especially for a card.  

To make this card project I chose the Dress Forms stamps that can be purchased from http://www.sincitystamps.com.  I hope you enjoy this project, below you will find step-by-step instructions on how to make your very own. 
Supplies List:
  • facade (surface): 8.5” x 11” cream card stock, 8.5” x 11” brown card stock, a couple sheets of garment district 6” x 6” paper pieces.
  • distress ink: gathered twig
  • distress markers: worn lipstick and frayed burlap
  • archival ink: black
  • embellishments: mini corners, metal corners and ruler ribbon
  • adhesives: glossy accents, double sided tape and pop dots
  • tools: craft sheet, scissors, ink blending tool, ripper and sewing machine
  • stamps used: Dress Forms Stamp Set
Step 1: Let’s start out by selecting our card stock, stamps and patterned paper.
Step 2: First start by taking the brown card stock and cutting it to a size of 10” by 7”.  
Step 3: Second take the cream card stock and cutting it to a size of 4.75” by 6.75”
Step 4:  Now take the patterned paper and cut it to set in as the background on the tag. We will then lay out the paper onto the card stop to figure out the back ground layout.
Step 5:  Next is to take the cut out pieces of paper and rough up the edges with the paper distresser and dirty up the edges with gathered twig distress ink.   Then apply them to the cream card stock with double sided tape.
We will use the sewing machine to add some stitching to the card to add dimension (this is not required).
 Step 6: Then we will take one of the dress form stamps and using black archival ink stamp this onto the card stock in the upper left corner of the cream card stock.
Step 7: Now we are going to start adding in dimension to the card by adding some ribbon.   I chose to use ruler ribbon and attach it using double sided tape.  I then used the sewing machine to add a jagged stitch into the ribbon on one side and a simple stitch on the other side.
Step 8: Now using more of the cream card stock we are going to use another dress form stamp and with black archival ink stamp that on to the card stock.  Then using a marker I colored in corset of the stamped dress form using worn lipstick distress marker.  I then colored in the base using frayed burlap.
Then using scissors cut that out the stamped image and place that onto the card using pop-dots.
Step 9: We have the back drop done and we will finish the card off by using embellishments to the corners.  I then took one of the word sayings from the stamp set and placed that on the card. I placed this onto the brown card stock that we cut to be 5” by 7” card.
Step 10: Final step is to dirty up the edges and we are all done.  Here is a picture of my finished piece.
Thanks for checking out this fun card project and if you don’t have the Dress Form Stamp set in your stash be sure to add them. 
Check out the store today there are such great stamps, stencils and products that you can chose from that will be great additions to your home.

Trent-TMCreative

Copyright Text

Blank Page Muse 2018 Sin City Stamps 2013