Tuesday, April 28, 2015

Faux Metal Etching Technique

Hello again my dear fellow stampers!  I hope everyone had a fun-filled weekend.  So, are you ready for some fun?

Today I want to share a simple yet fun technique that I believe has been around for a long time, but is sometimes forgotten.  It is a faux metal etching technique.  This technique is a bit different from faux embossing, as the results are not raised as much as in embossing.
The first thing you need is a piece of silver glossy metallic card stock and a rubber stamp, of course.


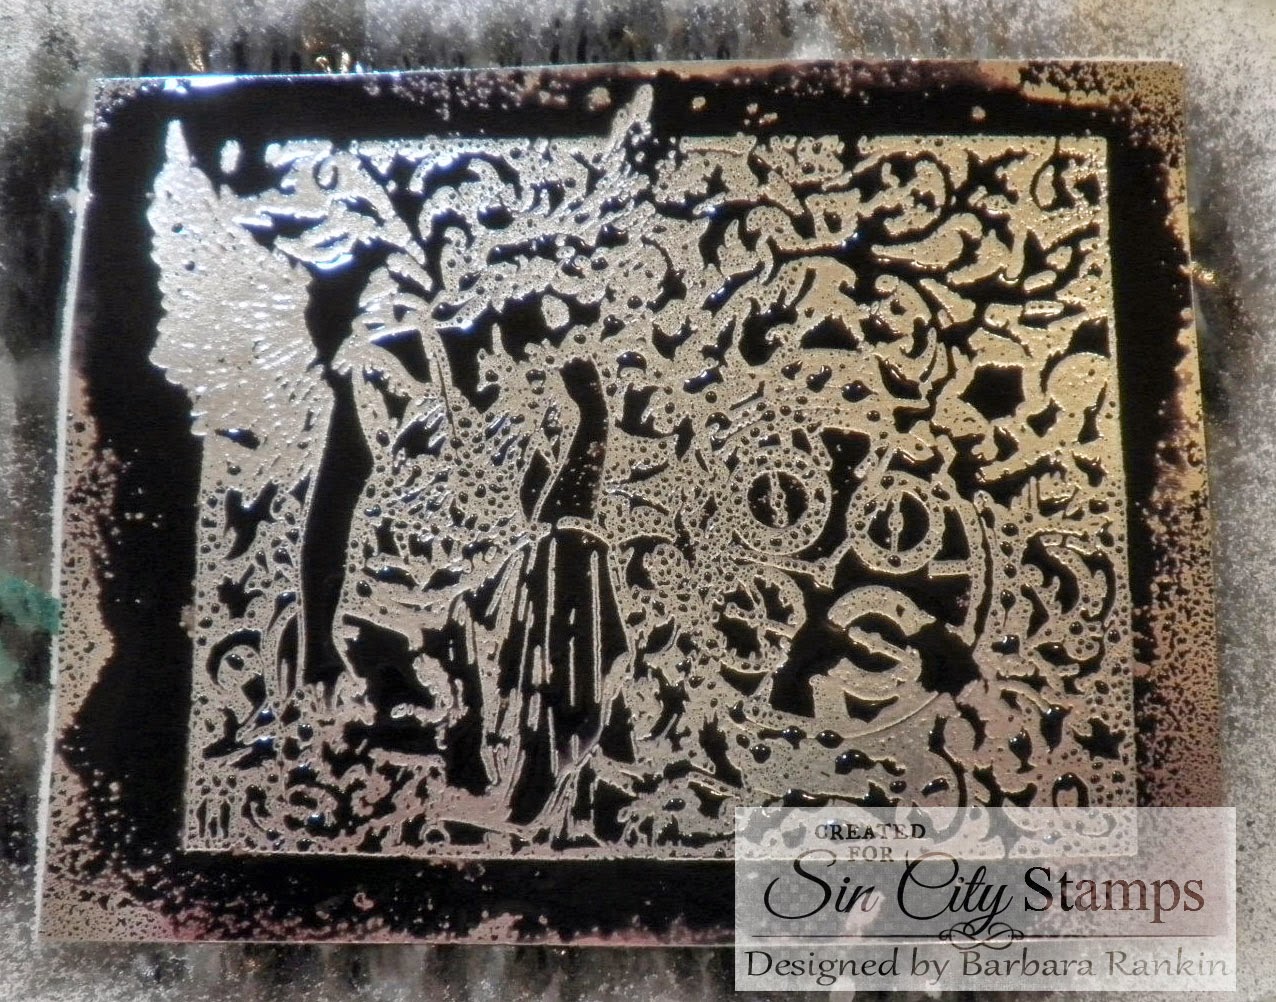
Ink the angel collage stamp with Versamark, or any embossing ink.  Heat emboss with detail clear embossing powder.
Heat emboss image.  I used detail embossing powder since my image has lots of detail, and it also is what gives the etched effect, rather than embossed.
Apply a coating of black ink, let sit for a few seconds.
Wipe away the excess.
The ink will remain in the crevices and give depth and dimension to the image.  I also like the antiqued effect from the ink.
I did a little pen work pen on the image with a Copic black to get more depth and dimension and help the image show up a little better.  It sounds like a lot of work, but it was very relaxing and I probably spent no more than ten minutes doing that.  I think the result was well worth it.
Trim around the image, leaving a small border and cut out around the wings.  Layer onto  4" x 5-1/4" black card stock, then to 4-1/4" x 5-1/2' silver card stock.

Add metal embellishments, as shown, with Beacon 3-in-1 glue.  Adhere to black pre-folded card front with foam tape for dimension.

Here is another card I made, this time with the background stamp from the Rosette Hearts set. I used the same technique as before.  However,  this time I first added Pitch Black alcohol ink, then removed excess ink with plain alcohol.  This left a reddish tint that resembles copper.  Very interesting.
So, next I added a wash of black fluid acrylic ink and some water, then wiped away the excess.
I got more black definition and some very cool colorations.
I trimmed the excess from the image, leaving a tiny border.  Then I cut a piece of green glossy card stock to 4" x 5-1/4" and adhered the image to that layer, which was then adhered to the black card.
I stamped the  three rosettes onto a scrap of copper glossy card stock with Versamark ink and detail clear embossing powder.  The three furthest to the left were embossed with regular clear embossing powder, but I lost all definition from these detailed stamps.  So I used detail clear embossing powder on the three to the right.  Can you see the difference?
I cut those three out and pressed each one onto a brown distress ink pad to get some antiquing and definition to the embossing.
I then added them to the card front, layering each with varying thicknesses of foam tape, and added black bling, as shown.
You can make this a lovely thank you card by simply stamping the "Thank You""Thank You" with black StazOn ink onto another scrap of the copper metallic card stock.  Punch out with label punch and edge with a black pen.  Add to upper left of card front with foam tape.

Supplies used:

Sin City Stamps:  Wing It; Rosette Hearts
Cardstock: Black, Silver Metallic Glossy, Copper Metallic Glossy, Green Metallic Glossy
VersaMark ink pad (or any embossing ink pad)
StazOn Black ink pad
Clear detail embossing powder
Heat tool
Fine Line black pen
Black swirls bling
Stampin Up Label Punch
Brown and Black distress ink
Liquitex black ink
Ranger Pitch Black alcohol ink
Blender tool with felt
Rubbing Alcohol
Black fluid acrylic ink
Beacon 3-in-1 Glue

I hope you enjoyed my project today and that I have inspired you to create something using this faux metal etching technique.  Play around with your stamps, inks and paints to see what you can come up with.  By the way, there are still a few more days left to get your Sin City Stamps and supplies, so stock up now.


Have a wonderful, creative week!

Barbara

Sunday, April 26, 2015

BIG BOLD BLOSSOMS STAMPS

I am so excited to share with you a card I made with my new stamps "Big Bold Blossoms"!!  Sin City Stamps makes the best red rubber art stamps!  I am so excited to be a part of this amazing company!!

Sin City Stamps has a HUGE sale going on right now~Buy 1 Get 1 FREE!! until 4/29/15


Supplies:


I cut my papers and sprayed ink through this stencil.  I kept turning the stencil so the lines would cross each other.


Then I stamped and colored!!  I am soooo happy with the size of the stamps!!

Don't forget about the sale!


You can buy a stamp set you have been wanting to get, and get mine free!  My "Big Bold Blossoms" set is only $20 for 8 big stamps!

Thank you so much for visiting!  Please let me know what you think about my stamps!!
xxDaniella

Thursday, April 23, 2015

Collage Canvas


So by popular demand my DT (Design Team) project today will be a Collage canvas.  This is one of my favorite styles to do on a canvas.
For this project I decided to use the Chain Link backgroundstamp and Steampunk’d Rubber Stamps set that both can be purchased from http://www.sincitystamps.com.  I hope you enjoy this project, below you will find step-by-step instructions on how to make your very own. 

Supplies List:
  • facade (surface): 8in X 10in Artist Loft Canvas (20.3cm x 25.4cm)
  • paper: idea-ology (Tim Holtz) WallFlower paper stash, manila card stock, brown card stock.
  • distress ink: gathered twig, pumice stone
  • archival ink: coffee, potting soil and black
  • embellishments: word band, jump ring, metal corners, flowers and big chitchat
  • adhesives: glossy accents, double sided tape, beacon quickgrip glue and pop dots
  • tools: craft sheet, mister, heat tool, scissors, ink blending tool, ripper, vagabond and sewing machine
  • stamps used: Chain Link background stamp and Steampunk’d Rubber stampset

Step 1: We will start by gathering up our supplies for this project and then let the fun begin.
Step 2: First start off this project by taking the canvas and using distress inks (gathered twigs and pumice stone) and cover the canvas with the distress inks using a blending tool. 
Take gathered twig distress ink (you will come to learn this is one of my favorite colors- I use it in most of my projects) and cover the canvas and also apply the distress ink color of pumice stone as well.
Step 3: Now that you have the background of the canvas started lets then create the water drop effect onto the surface of that.  Take a water mister and squirt water into the palm of your hand.  Then flick the water onto the canvas.
Then using your heat gun start drying the canvas and then blot up the remaining water with a cloth or paper towel.
Step 4:  Now we need to seal the canvas and this is because distress ink is reactive with water we need to seal the canvas.  So I used Matte Finish spray and sprayed the entire canvas and set it aside to let it fully dry.
Step 5:  Our next step is take some of the wallflower paper stash paper to determine our background.  In this process I am trying to figure out our pallet lay out.
 Step 6: Now that we have determined our paper.  We will begin to cut this down to the sizes we want to use on the canvas.  We will be making block back ground squares that will then show case our stamped images and embellishments we use.
Step 7: We are now going to start placing the blocks we cut out onto the canvas and determine our layout. 
Step 8:  Now that we have the blocks determined we are going to use the sewing machine around the boarders to add a simple stitch.  However before we do that…
Step 9: Take the blocks now and using the paper distresser rough up the edges.  Then dirty up the edges with gathered twig distress ink and add a simple stitch to block the image.   This adds that additional element of detail.
Step 10: Then we are going to start stamping images and adding them to the canvas onto the blocked images.  I started off taking the Chain Link background and using potting soil archival ink I stamped the image on manila card stock.
I then applied some gathered twig distress ink to dirty up the edges and across the face of the stamped image. 
I finished it off by adhering it to the canvas with idea-ology long fasteners.
Step 11: We will continue this process of adding embellishments and stamped images to the blocks. 
Step 12: I then took the two pocket watch stamps from the Steampunk’d stampset and using coffee archival ink stamped those on manila card stock.  I then cut each of those images out.

Step 13: I then adhered the blocked images to the canvas using Beacon quick grip glue.

Step 14:  Final step was to add more embellishments.  An I added a word saying to the canvas as a final touch.
Thanks for checking out this fun canvas project and if you don’t have the Art Journaling stamp set in your stash be sure to add them.  This is a must have and will be a great addition to for your craft stash.
Check out the store today there are such great stamps, stencils and products that you can chose from that will be great additions to your home.

Trent-TMCreative

Wednesday, April 22, 2015

A bit of Wonderland


Hello All Lanette Here!

Today I am going to share a page out of my Art Journal. I love my journal because there is no rhyme or reason for it, its only purpose is for me to get a bit of color on my hands. Which really is my happy place. :)

So first,  lets start by taking a look at my finished page, then I will show you how I made it! :)


Sin City Supplies Used:  Alice Art Rubber Stamps & Rosette Hearts

Other Supplies Used: Art Anthology Gesso, Dylusions Paint, Faber Castell Pitt markers, White Uni Ball Pen,

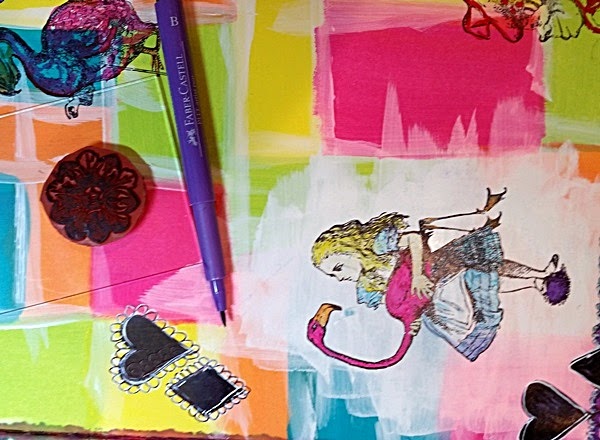
Now lets look at my process. Using a bit of foam I started painting squares and rectangles. I just kept picking colors and moving around the page, again no rhyme or reason.


 Here is a look after I finished making my squares and rectangles, not perfect but pretty!


Next I decided I wanted to add a image of Alice to my page. So I added some gesso to make the perfect spot for her.


I just love adding a bit of Wonderland to my Art Journal!


 A bit of doodling and a bit more stamping....


 Next it was time to color and a dd a few more stamps. I added a bit more color using my Pitt Markers and Rosette stamps.


  Lots of doodling and a bit of coloring and that's it a pretty page to share! Easy peasy no rhyme or reason just some colorful fun!


And just a few details for fun!


Thank you so much for stopping by today!

I hope that I have inspired you to have some inky fun of your own!

Remember to like us on Facebook and stop by the store for all your stamping needs!!

As always feel free to stop by my blog Stacks of Scraps anytime!

Monday, April 20, 2015

Happy Birthday Banner Card


Hi Chris here today, and I want to share this cool card I made.  I love that it looks so sweet, but didn't take hours to make.  I used mostly white papers and embellishments and inked them all to match -- which is a great way to stretch you supplies! Plus I got to play with lots of ink and markers *grin* Sometimes you need a card that whips up in short amount of time, but still lets you play!!!

For this project I used
Sin City Stamps Alice 2
My Minds Eye patterned paper
Tim Holtz Distress Inks- Broken China, Spiced Marmalade, Scattered Straw, Tea Dye, Abandoned Coral
Tim Holtz Distress Markers - Old Paper, Tattered Rose, Tumbled Glass, WIld Honey, Barn DOor, Squeezed Lemonade, Evergreen Bough, Peacock Feathers
Ranger Archival Ink - Sepia
Pre-Made Banner - The Paper Studio
Sizzix Die #660220
Elmer Spray Adhesive
Colorbox Design Adhesives
Doodlebug Glitter
Card Base- The Paper Studio

I started by inking my background paper with my distress tool first with Broken China, and then with the Spice Marmalade.  I let the colors overlap slightly.  I left the center mostly free of ink to provide a bright area behind my stamped image.


I then die cut the "scroll" lattice using the Sizzix die and white paper, but decided the white didn't match the vintage-y style I was trying for so I gently inked the paper with distress ink.

I added the die cut to the lower right hand corner of my background piece, and then trimmed off any excess.  To adhere this delicate die cut I did break out the spray adhesive. 

I used the pre-made white banner and inked each banner to coordinate with my card.

I then attached the banner to the upper left hand corner of my card.

For the greeting I used Color Box Design Adhesives, which have adhesives on both sides of your design, making it super easy to add glitter.


I then used these wonderful Alice Stamps from Sin City Stamps and have been dying to play with them.

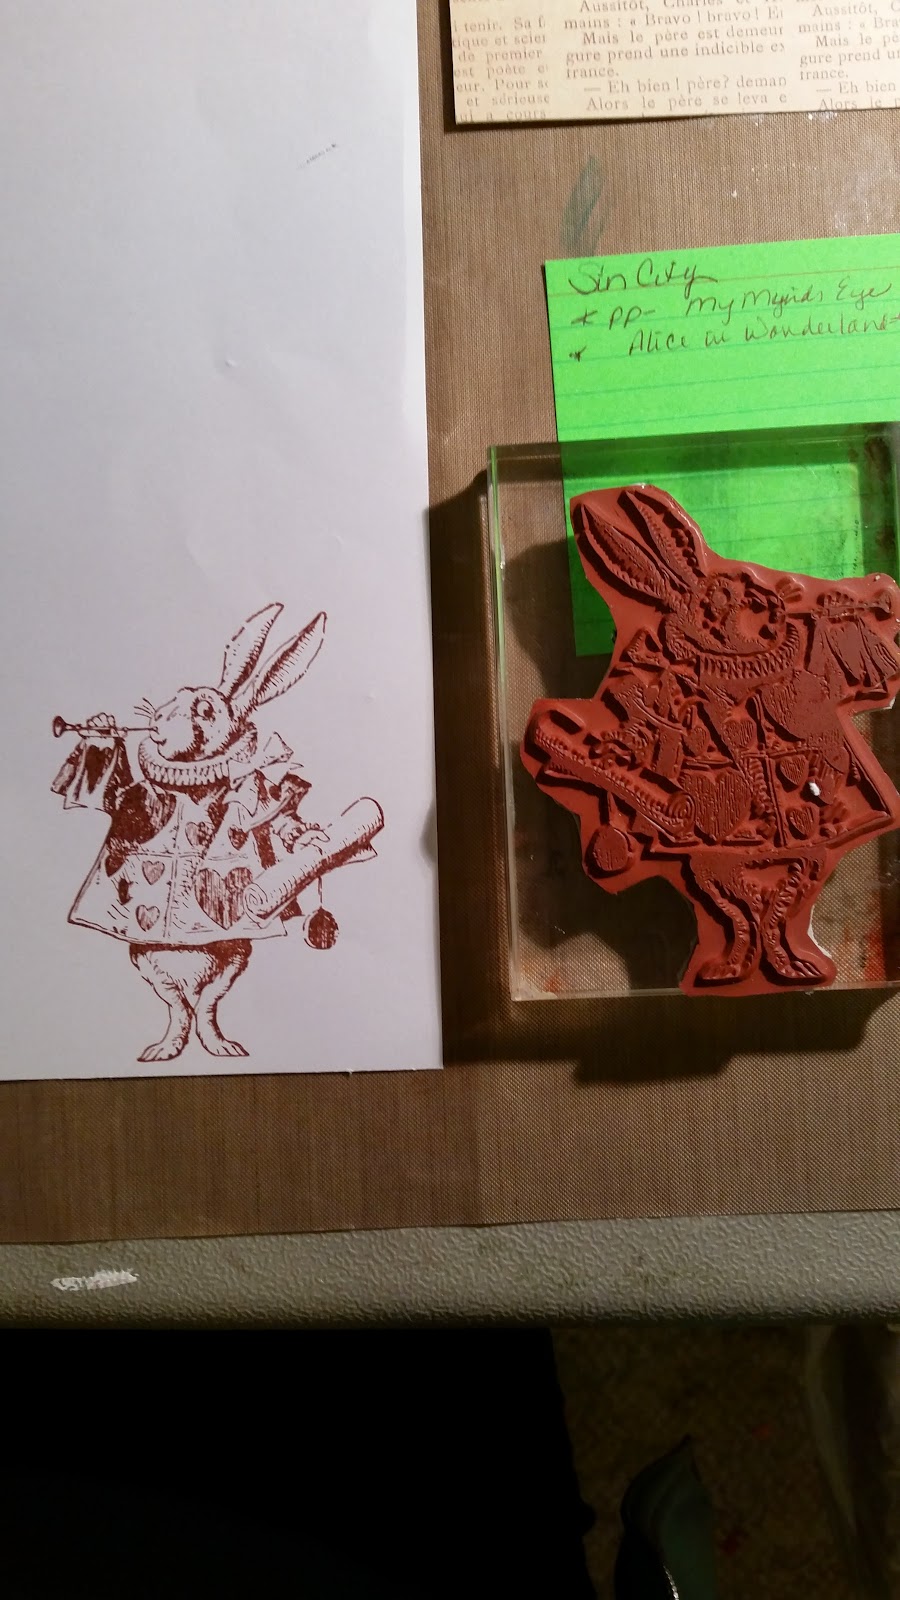
I stamped the rabbit on to white paper using the Sepia Archival Ink.

 I then used my Tim Holtz Distress Markers to color him in.  Since I was going for a more vintage-y look I tried to stick with more muted colors.  To tone down the brighter colors  I added a bit of Old Paper accents to the areas colored with Squeezed Lemonade and some Evergreen Bough to the Peacock Feather areas. I then Fussy cut out my image. ( The image below show how bright the Squeezed Lemonade and the Peacock Feathers were before I toned them down.)


I added the stamped image to my card to finish off my card.

 I hope you decide to try some of these techniques.


Copyright Text

Blank Page Muse 2018 Sin City Stamps 2013