Friday, March 30, 2018

Flying High Hog ATC

Hello all Blank Page Muse blog readers.
Cathy Norton here with a Flying Hog ATC.

Stamps Used:
Hog
Small Fairy

Other Supplies Used:
ATC
Paint sticks
Black ink
Foam squares
Copic or other blending markers
White acrylic paint
Blending sponge
Cloud stencil


  • Begin by using the paint sticks to color in the ATC.
  • Use blues, pink and orange to make it look like a sunset.


  • Place a cloud stencil over your ATC and apply some white paint with a sponge.
  • Carefully lift off stencil.
  • Set ATC aside to dry. 


  •  Ink and stamp the hog onto white cardstock. 
  • Color him in with your markers. 
  • Carefully cut the hog out.
  • Repeat this now with the small fairy wings. 


  • Cut these out and adhere to the back of the hog. 
  •  Use foam squared to attach the flying hog to the front of the ATC

Visit our Fan page for more inspiration! 

Wednesday, March 28, 2018

Beauty ATC


Hi everyone! Leslie from Love To Scrap 2 here with you today to share a Blank Page Muse Inspiration Team project tutorial!

Supplies used:
Art Journaling #2 Rubber Stamp Set
Words by Jane Man & Woman Figures
Mannequin Dress Form Tags Rubber Stamp Set
Classic Spark Rubber Stamp Set
Synthetic paper
Alcohol inks (pink, orange and reds)
Black solvent ink, black distress ink and black dye ink
Alcohol markers
Watermark ink
Oval die
Clear embossing powder
Flat-back pearls
Fabric flower
Stamp positioner

Drop orange, pink and red alcohol ink along with blending solution, on a piece of synthetic paper. Repeat the process until you achieve the look you want. Allow to dry completely.

Trim the paper to ATC size (3.5" x 2.5") and stamp the brick background from the Art Journaling #2 Rubber Stamp set twice in a black solvent ink.

Stamp the sentiment from the Mannequin Dress form Tags Rubber Stamp set in black dye ink on ivory cardstock. Using a stamp positioner, stamp the woman from the Words by Jane Man & Woman Figures stamp set and the set of wings from the Classic Spark Rubber Stamp set, also in dye ink, and leave on the stamp positioner. Stamp the wings again in watermark ink over top the black ink and clear heat emboss. Color the woman and wings with alcohol markers.

Fussy cut the woman and the wings, and attach the wings to the woman. Die cut the sentiment. Arrange the woman, sentiment, some pearls and a fabric flower, and your ATC is complete. :)

I hope you’ve enjoyed today’s project! Be sure to check out the Blank Page Muse Facebook Fan Page, and be sure to check out all the fun stamp sets at the Blank Page Muse store! Thanks so much for stopping by today – we’ll see you next time! ;)

Scrappy hugs,
lesliesig

Monday, March 26, 2018

Which way do I turn?

Hi Everyone,
Are you directionally challenged like I am? I can seriously get lost in a paper bag. 
Here's a little card, funnily enough with directions on how to make your own.
Product List:
Archival Ink
Distress Inks
Corrugated Paper
Metallic Paper
Specialty Stamping paper
Cardstock
Waterbrush
Sentiment Sticker
Gel Pens
Adhesive tape
Scissors


Stamp your Old Tyme Pointing Hands using a permanent ink.  
Color you hands in and then cut them out. 
For your background blend inks together creating layers for interest. 
Stamp your background corners using the Flower and Leaves Border. The background stamps weren't stamped perfectly to give more of an old printing press type of feel.  Glue your hands down to the corners where you stamped the border.  Add your sentiment using foam tape to pop it up a bit.
Add bits of gold and black pen to accentuate random areas. 
Cut a piece of corrugated paper and ink the edges. This will be the layer directly under your stamped piece.  
Sand down a piece of metallic paper to expose the layers and give it more of a grungy feel.  This will be layered under the corrugated paper.  
The final layer is your actual card piece.  

Hopefully these directions didn't make you feel too lost! 
Jess

Have something you'd like to share? Need more Inspiration? Visit our FAN page for more idea's!


Friday, March 23, 2018

Grungy Greetings


Hello there!! 
Jenn here sharing my grungy greetings cards using some amazing Blank Page Muse Stamps!

Stamps Used:


Other Supplies Used:
Ink Sprays
Cardstock
Adhesive runner
Glue
Dew Drops
Foam adhesives
Clear embossing powder
Black embossing powder
Embossing ink
Black Archival ink
Distress Ink
Stencil
Black Card bases 5 X 6.5

  • Start by stamping the heart and dragonfly onto cardstock using black archival ink pad.
  • Coat ink with clear embossing powder, shake off excess and heat set with heat gun.
  • Color the embossed images using inks or watercolors, let dry and cut them out. Set aside and move onto the backgrounds.
  • On the plain cardstock,  apply the ink sprays in desired colors with a stencil. Be sure to dry in between colors.


  • Cut two 5 1/2" X 4 1/4" pieces from this. Apply adhesive to the back and place on your card fronts.


  • Add the stamped cut-outs using foam adhesive squares as shown.


  • Use a sentiment stencil to trace out the words using embossing ink pen. Coat with black embossing powder, shake off excess, and set with heat tool. To add that splattered grungy look, add splatters of embossing ink before adding black embossing powder. Cut out and adhere to card fronts using adhesive foams.


  • For the inside of the cards, cut two 5.5" X 4.25" pieces of plain cardstock in light color such as ivory. Use the same heart and dragonfly stamps and black archival ink pad to stamp onto plain cardstock. Only stamp half of the stamp on bottom edge.


  • Use adhesive on the back and adhere to the inside.


  • Add some dew drops or other bling in your stash randomly to the front and there you go! 
Simple but grungy good cards!!


Thanks so much for viewing my post today!! I hope you are inspired to get creative and grungy!!
Visit our Fan page for more creative idea's!

We also have a fun themed challenge every month! Come join us!
Still time left for this month's theme
Blue hearts and time.

Until Next Time,
Jenn


Wednesday, March 21, 2018

With Sympathy Card

Hello Gals,
I'm glad you stopped by for my second project of the month. I hope you will gain some inspiration to try your own sympathy cards. They are certainly not the easiest thing to make during a difficult time.  I always try to keep a few tucked away so that I don't have to struggle during a stressful time when I may not be feeling particularly creative. In reality, this design is suitable for a variety of sentiments (birthday, thank you etc...) but in this case it seemed to me to require a sympathy sentiment.
These rubber stamp designs are available at the Blank Page Muse.
www.blankpagemuse.com

Blank Page Muse Stamps:
Birds & Clocks Rubber Stamp Set
 http://blankpagemuse.com/birds-clocks-rubber-stamp-set/
http://blankpagemuse.com/art-journaling-2-rubber-stamp-set-by-terri-sproul-sc24/


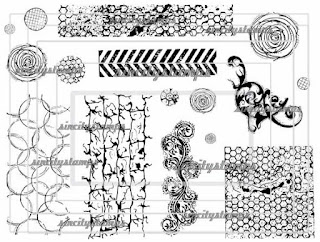
Background Grunge Art Rubber Stamp Sheet designed by Pam Bray

http://blankpagemuse.com/background-grunge-art-rubber-stamp-sheet-designed-by-pam-bray-scpbr-001/

Other Supplies:
  • Platinum pigment ink pad
  • Pink pigment ink pad
  • White pearl cardstock
  • Watermark ink pad / clear embossing powder / heat gun
  • White gel pen
  • Embossing tool
  • Mini pearls
  • Gold sentiment 
  • Pink card base


Directions:

1. Stamp the flourish image randomly across the card base. Use platinum ink to stamp the background making sure to vary the position by rotating the stamp for each new impression.

2. Stamp the roses onto white pearl cardstock using watermark ink. Then emboss with clear embossing powder and heat set. Rub a pink ink pad lightly over the images and cut out. Next, cut out some simple leaf shapes. For added detail, use an embossing tool to draw the vein down the center of each leaf. Stamp the bird using pink ink, carefully cut out, and set aside.


3. Use a white gel pen to add highlights and detailing to the stamped background image. Select various dots and carefully trace over them to subtly enhance the design.  Adhere the cluster of roses to the lower right corner and the bird to the upper left corner.

4. Finally, embellish the card with a gold sentiment in the upper right corner. Add a pearl for the bird's eye and a small scattering of various gold dot accents.

A Closer Look:


 To purchase the stamps to complete this project, visit www.blankpagemuse.com

For more inspiring paper-craft projects from the Design Team, be sure to visit us at

Follow us on Facebook and
Join the Blank Page Muse Fan Group...HERE


https://blankpagemuse.blogspot.com/p/creative-challenge-rules.html
Come play with us in the NEW Monthly Creative Challenge
  Checkout the Blank Page Muse Creative Challenge.
This month's theme is ATC.
Create a new project following the theme and add it via the Inlinkz linky tool.
There will be a random drawing prize for a Blank Page Muse Gift Certificate.
You can find all the guidelines HERE.

To learn more about our fabulous designer Karen and see more of her projects
visit her blog...Art & Soul.
Thanks for visiting!

Monday, March 19, 2018

Fairy Dreams ATC


Greetings!  Chris here and today I am theses Fairy ATC inspired by this month's challenge! One of my favorite things to do in mix and match my stamp sets! These ATC mix and match 3 different stamp sets!

To recreate these ATC you will need the following:

BPM Fairies & Blossoms 2
BPM Flower & Bird Sketches 
BPM Inhale...Exhale
Other supplies: Watercolor Markers, Cardstock, Sticker sayings, Water brush, Archival Ink

Stamp flowers  onto ATC.  Given that the fairies are solid in nature it is easier to stamp these on top of your flower images.


Stamp Fairies slightly overlapping the flower images.


You can stamp fairies first but I found it easier for placement to stamp flowers first.  


Color your images with watercolor markers and a water brush.   I added blades of grass with my water brush.  For each flower I layered several color of marker to create a more natural color.


Mat the  ATC onto cardstock and add sticker saying to complete.

Here are some close ups of each card.


Join us at The Blank Page Muse Stamps Fan Group and show us your Blank Page Muse creations!
Don't forget to enter our monthly challenges to win some great prizes!
Challenge for March- ATC, enter yours here!

Copyright Text

Blank Page Muse 2018 Sin City Stamps 2013